 In this picture, my students were practicing subtraction with and without regrouping. Instead of completing all of the problems from the textbook, I showed my students a few examples, left them on the board and then paired them up! Each student received 3 dice (yes, that’s a lot of dice, but Dollar Tree has cheap “eraser dice” that don’t make noise) and laminated paper with subtraction frames so they could use dry erase markers. Both students rolled all their dice and they would write the larger number in the top frame and then subtract the smaller number. I just floated from group to group and helped reinforce any concepts or clarified when the partner answers didn’t match.
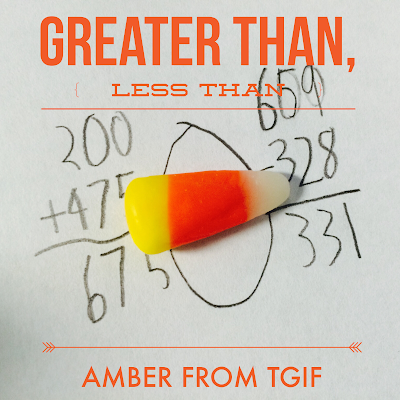
 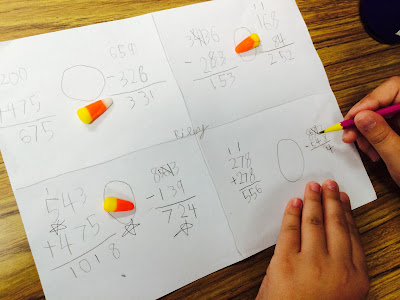 Food is always a great motivator! In this case, my textbook had a lesson that was mixed addition and subtraction as a review before the test. Rather than complete the whole page, I had them fold a paper in fourths, and we wrote two problems in each of those fourths with a circle (about the size of a quarter) between the two math problems. Here’s where the MAGIC took place. I opened a bag of candy corn (peanut free – yeah) and placed one in each circle. (Cheap motivation!!!! 4 pieces of candy corn per child.) I asked the students to make the candy corn show which problem they thought was greater than/less than (making estimates) AND THEN do the math to figure the sums and differences (exact amounts). They could then change their greater than/less than symbol (candy corn) if they needed to. I was able to hop around the room checking each student’s paper. If they received a star on that section, they were allowed to eat one piece of their candy corn and move on to the next two problems.
  I have found one of the best ways to keep my students focused is with lots of movement. In this case, I was using 3 Digit Addition with Regrouping – Pirate Riddles task cards, but you can simply cut a worksheet up and post the numbered problems around the room or in the hallway. Give your students a clipboard and a sheet to record their work and watch them focus. I can’t quite figure out the allure of it all, but when the students walk around from math problem to math problem it is sort of like a mini brain break between each task. I have NEVER had students off task while doing this activity (shhhhh, don’t give away my secret – we do it a lot). Most of the time, I pair students up (since we are usually practicing concepts) and I just walk around, answer questions, and check random problems. That’s right! I don’t check every answer!!! Woot woot. However, you could use this idea as an assessment and have them complete it as individuals.
 4. Sort, Sort Sort!
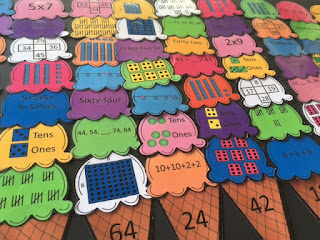
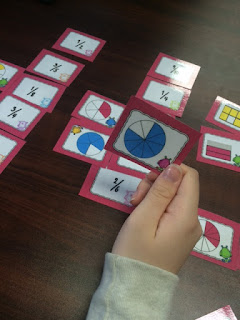
I love using math sorts in the classroom. It makes math hands-on and the students can reuse the sorts again and again! This is such a HUGE time saver for me because after the original copy work, we can use the sorts for days (or even months when I stick them in my centers)!
Why math sorts?
– It helps your students think critically.
– It makes math meaningful and more engaging.
– The sorts can be used multiple times.
– The kids don’t even realize they are learning. It is more like completing a puzzle.
– Math sorts works well for your visual and kinesthetic learners.
– Did I mention, it saves the teacher lots of work and minimizes copies?
Want to give them a try for FREE? Check out these sorts:
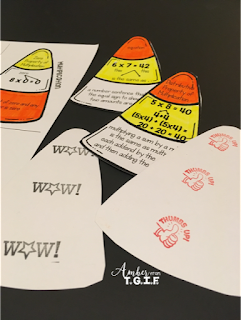
This free multiplication sort was a HUGE help to my students who were really struggling with the vocabulary.
1. I made copies on cardstock and then had my students color the candy corn with markers.
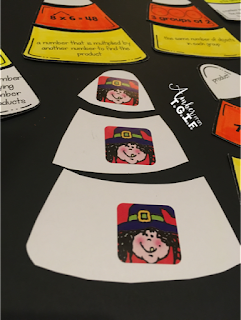
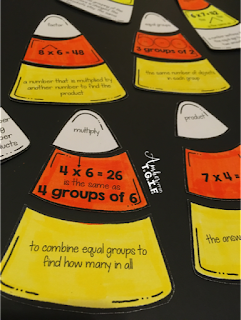
4. We mix up the cards and have them facing up. The students read the cards and try to match the 3 sections up correctly.
5. When they think they have them sorted correctly, they can flip them over to see if their picture match!
6. We will put them in a bag and sort them once per day for at least a week. I also put one of the sorts in my centers for continued used throughout the unit.
P.S. Can you find the mistake in the pictures? Oopsie! It has been fixed.

At the beginning of using these sorts, I give my students a white board and dry erase marker with these sorts. This way they can draw pictures of the fractions before sorting them. As they practice them several times, they are able to begin sorting them without drawing and just visualize.
Do you want to add lots more sorts to your centers?
There are more sorts available in this 3rd Grade Math Centers bundle.
