As a third grade teacher, I can tell you distributive property of multiplication can be a frustrating topic to teach, especially if your curriculum thinks your students are going to magically learn this in one day. Nope! The curriculum books usually fail miserably introducing the concept of distributive property, so I am going to give you ALLLL my tips to help make it a success in your classroom! I teach this concept over 2 to 3 days and I continue to review it every once in a while over the next few weeks (or else I might as well not teach is at all since they will forget it in a day).
Here is how I break it down into manageable steps.
DAY ONE Plans for Distributive Property of Multiplication
Where Do I Start Teaching????
I start with giving my students a pre-printed array that is a fact I know they won’t have memorized like 5×16. I ask my students to work with a partner to figure out the product. I give them two minutes to come up with an answer. Some of them will count the tiles and get it right, but we will end up with several answers.
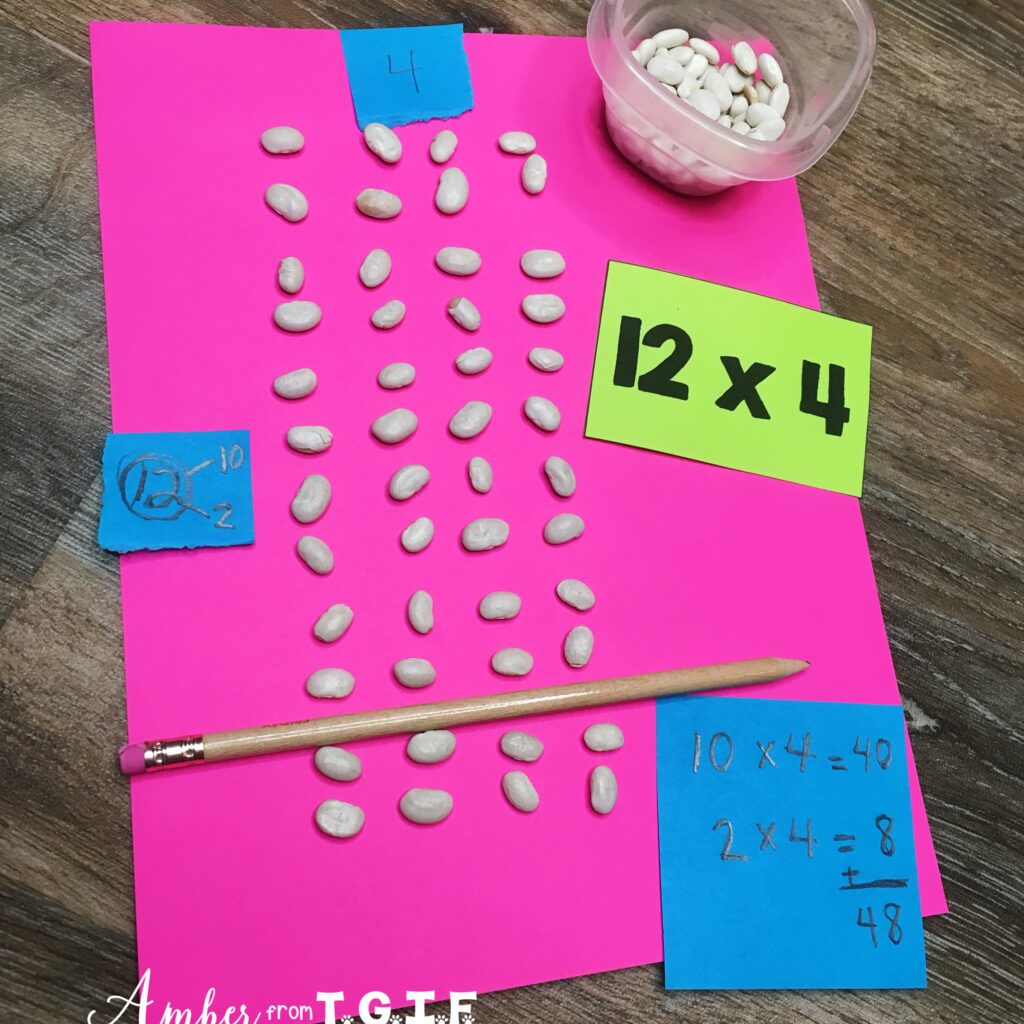
I will then ask them to try to solve another ridiculously hard multiplication problem (ex. 17 x 4). I let them use dry erase boards, beans, pencil paper, color tiles or whatever they want to try to solve it. We share our answers (as we usually have several different answers – some right and others wrong). We also share “how” we tried to solve it and we also talk about how it was time consuming to draw pictures of all of it. We will spend the majority of the rest of the class period trying to solve tougher multiplication problems using arrays and breaking them apart.
Break Apart Multiplication Arrays
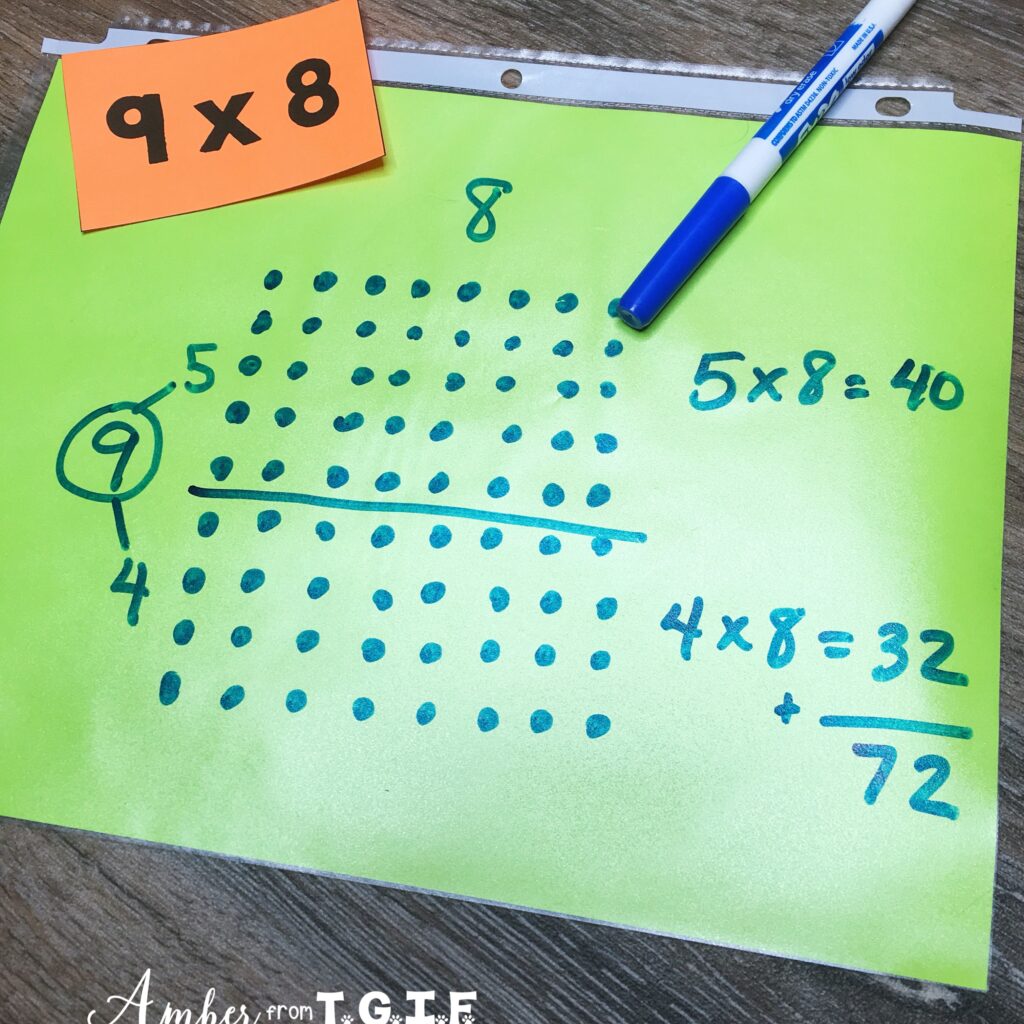
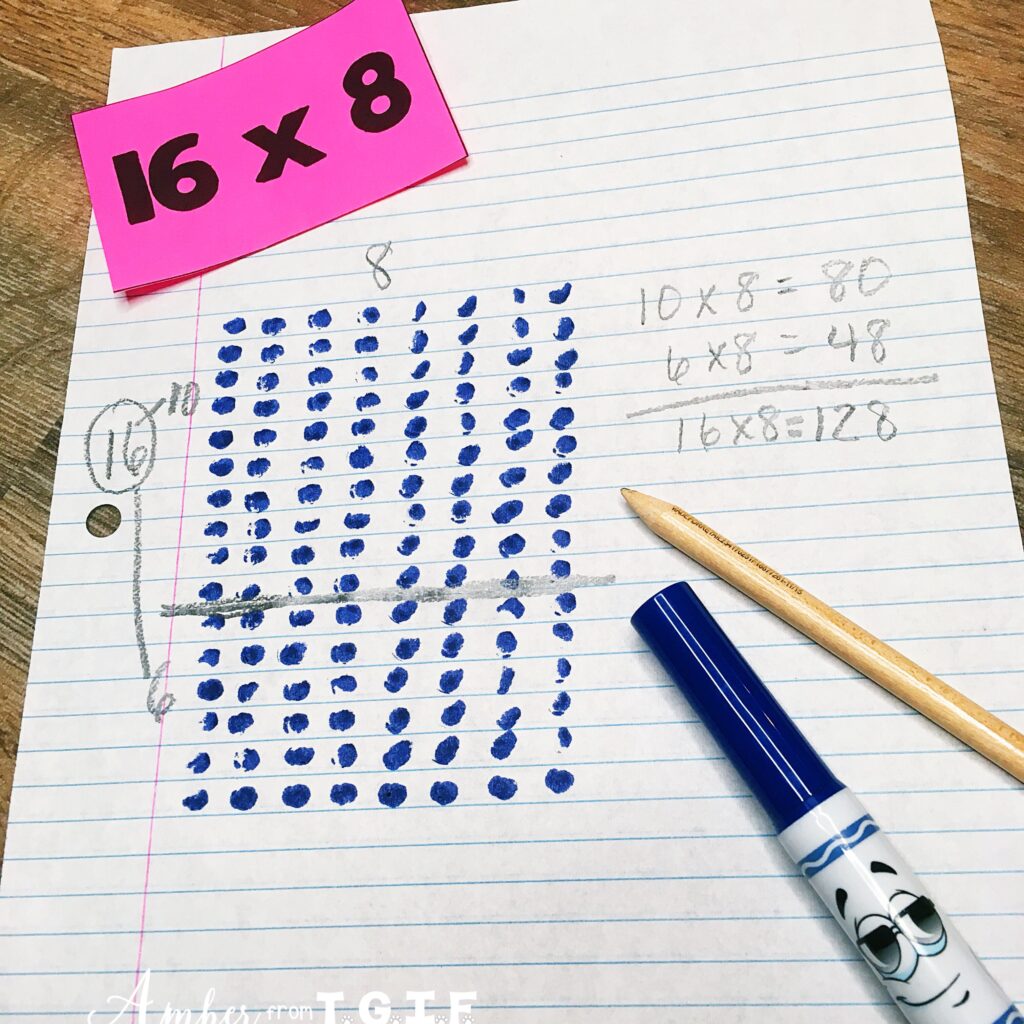
I show my students HOW to break apart arrays into simpler facts they already know. I display this on my SmartBoard or show them with color tiles. For larger facts (14 x 5) I will show them how to split 14 into 10 and 4 and for smaller facts (3×9) I will show them how to split the 9 into 5 and 4. I always encourage them to find numbers they are fast at (5’s 2’s 10’s, etc.) This step of knowing how to break apart a number into smaller numbers that they know the multiples for is a critical step.
We use dry erase boards, paper arrays that we cut apart and color tiles that we break apart with our pencils into smaller multiplication facts. When they break apart the arrays I have them write the two smaller multiplication facts underneath, write the two products and then add them. This helps them make the connection to WHY we use distributive property of multiplication. After some practice and they understand WHY we break apart the arrays, we are now ready to use distributive property of multiplication on those larger facts.
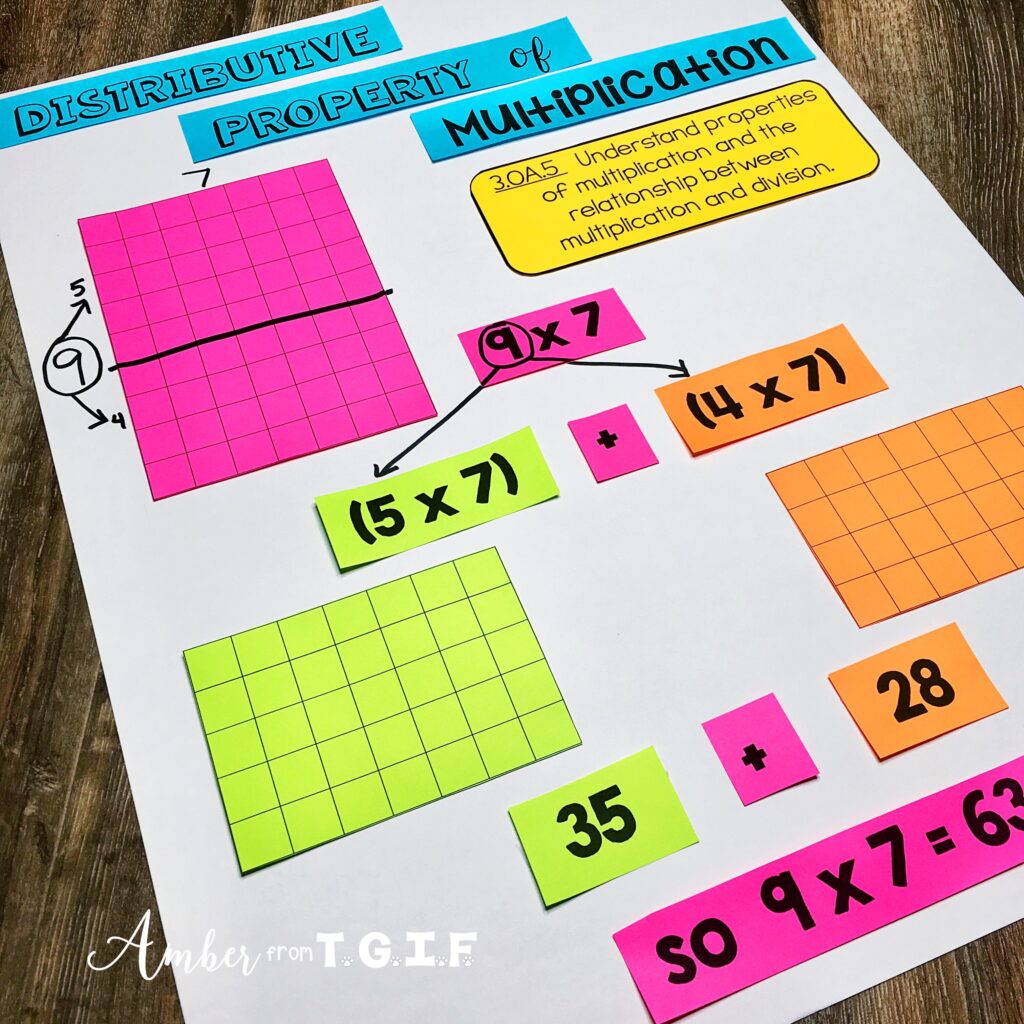
Make a Distributive Property Anchor Chart
I end the day by working with the students to take what they learned to make an anchor chart. Since drawing is not my thing, I cheated and made an anchor chart on the computer to print. We put it together in class. It shows all the proper steps that we will be practicing on paper tomorrow!
The printables that are shown are available for purchase in this Distributive Property of Multiplication resource pack, but they can also be easily made using grid paper, index cards, paper protector sheets, and a good old fashioned pen and paper. It’s how I make most of the additional resources in my classroom (until I have enough time to make it on the computer).
DAY TWO Plans for Distributive Property of Multiplication
Review Distributive Property with Manipulatives
I start the day with a quick review of breaking apart our multiplication facts using anything – beans, pencil and paper, color tiles, dry erase.

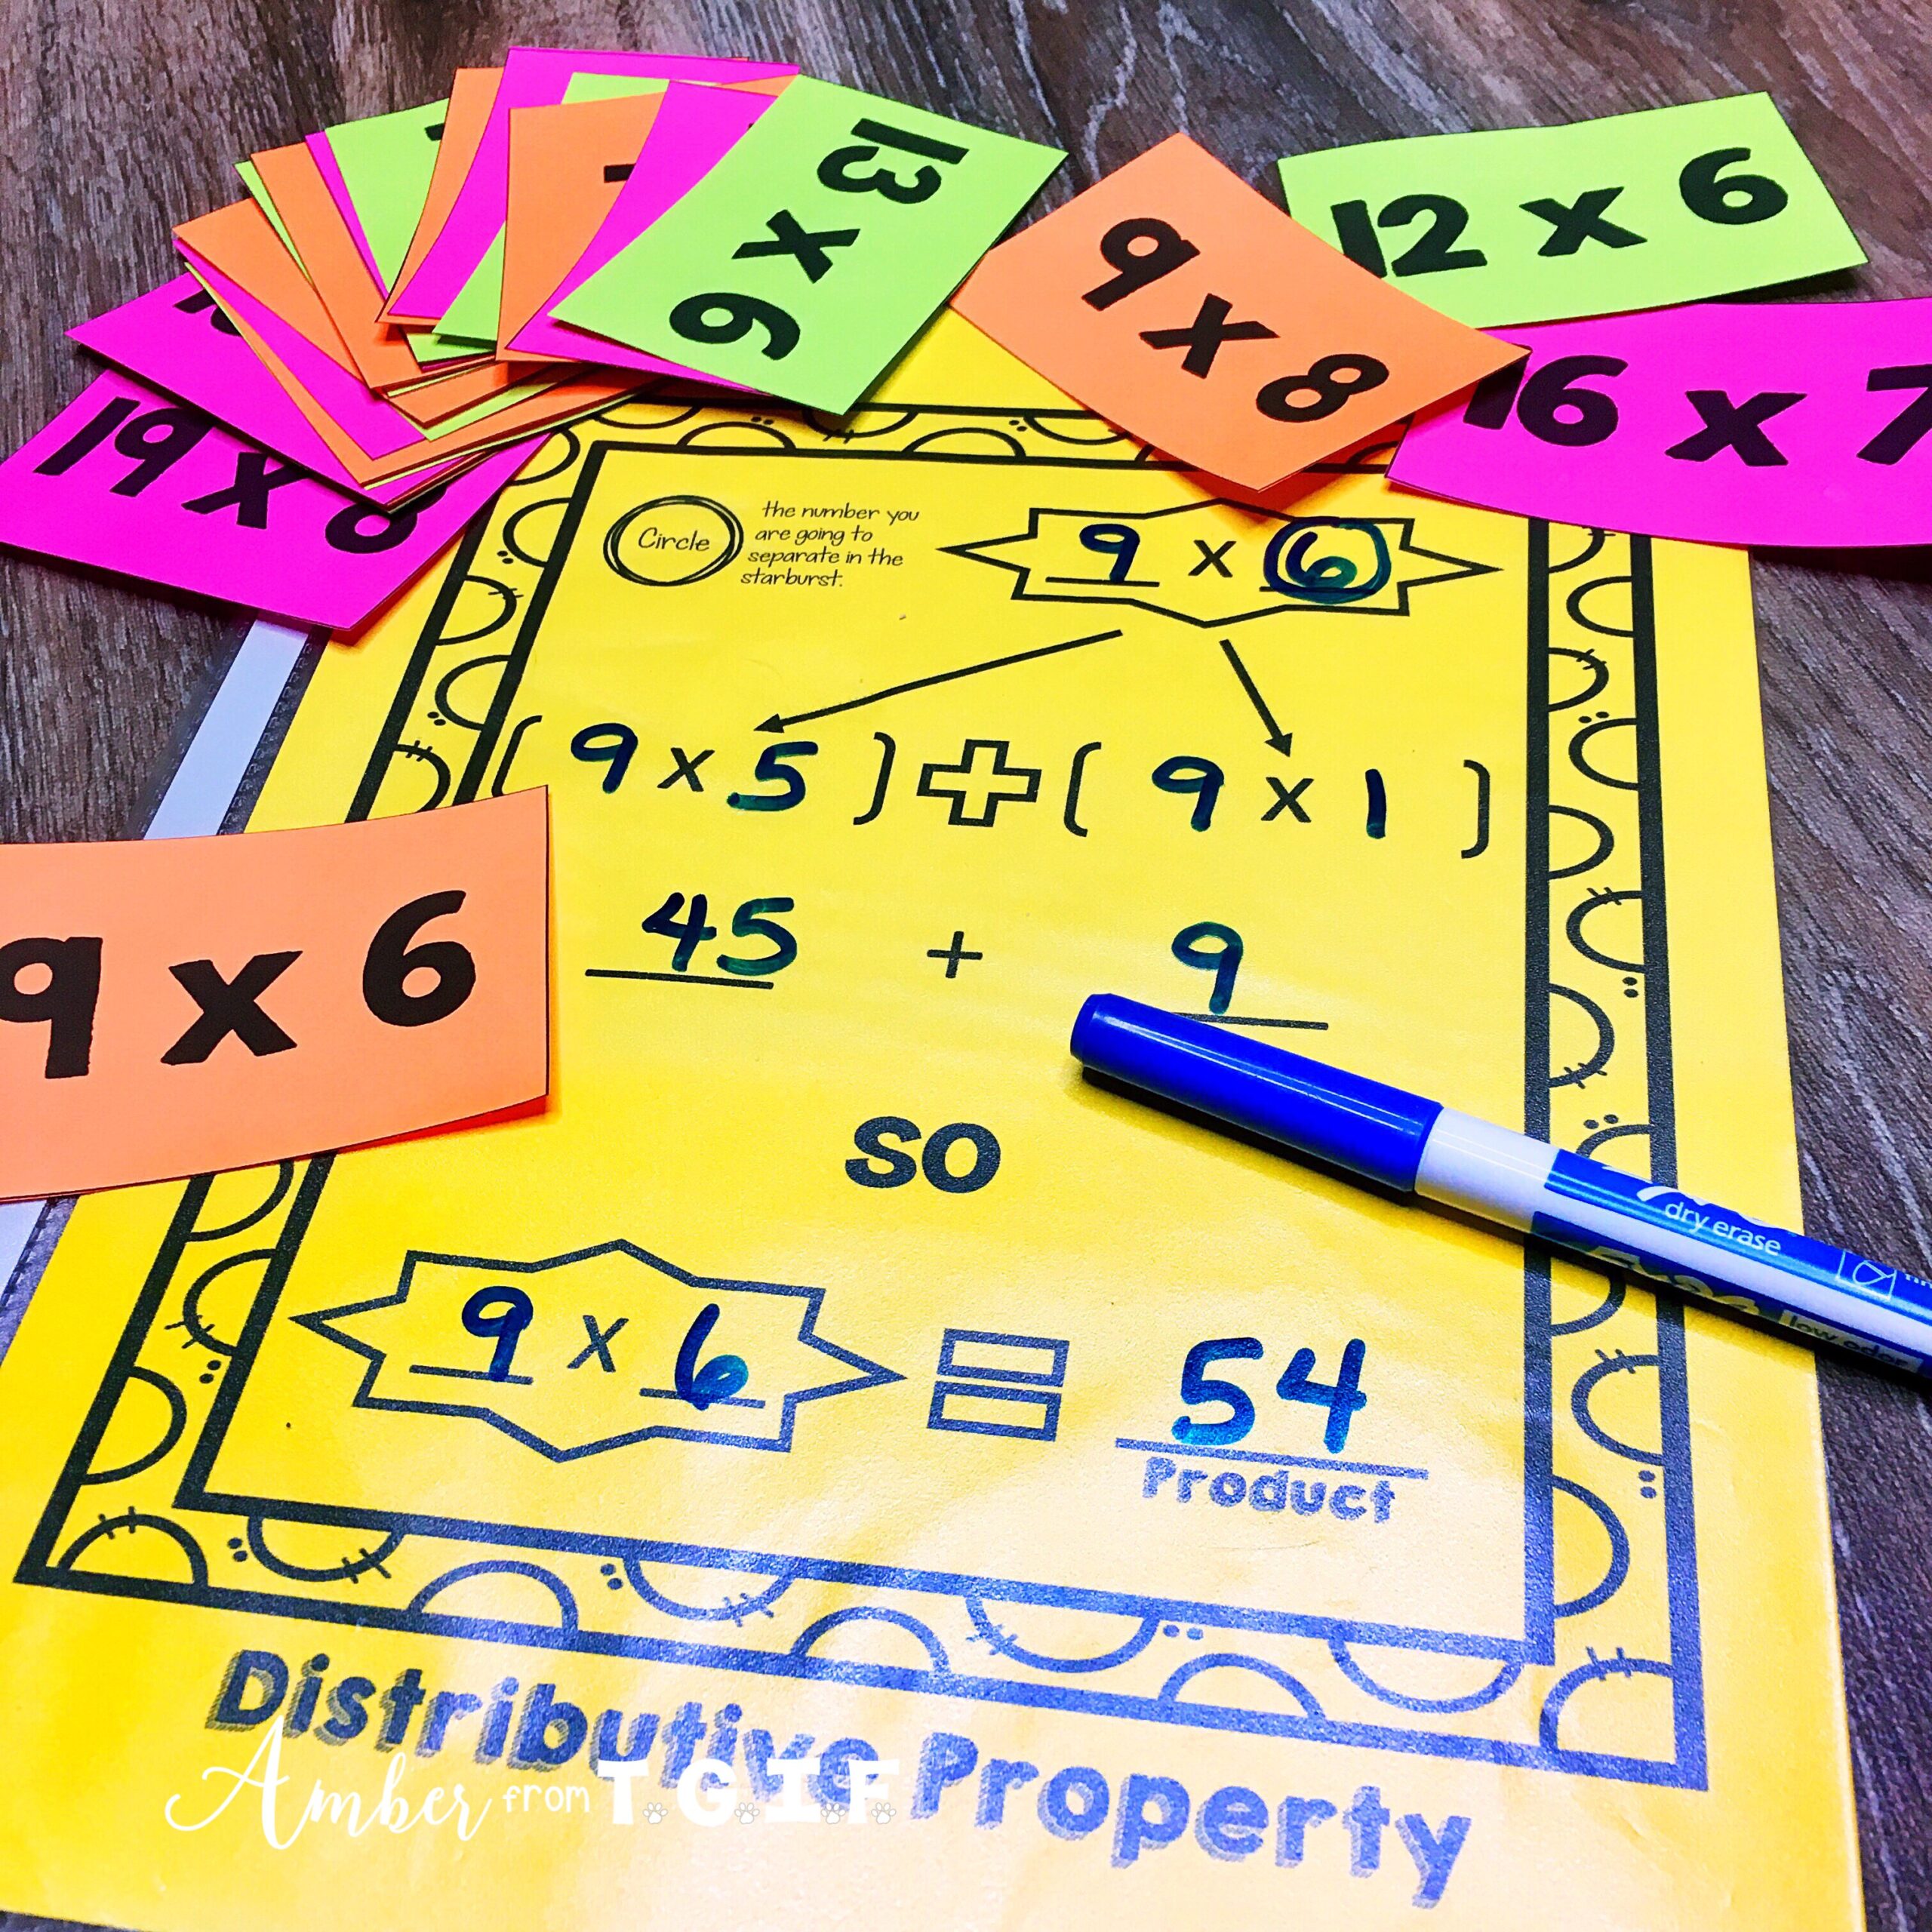
Practicing Distributive Property on Paper
Then we move right into using Distributive Property dry erase mats and pre-printed multiplication fact cards. This helps me differentiate with groups and individuals when needed. My biggest tip here is to have the students CIRCLE the factor they are going to break apart. It is a great visual reminder.
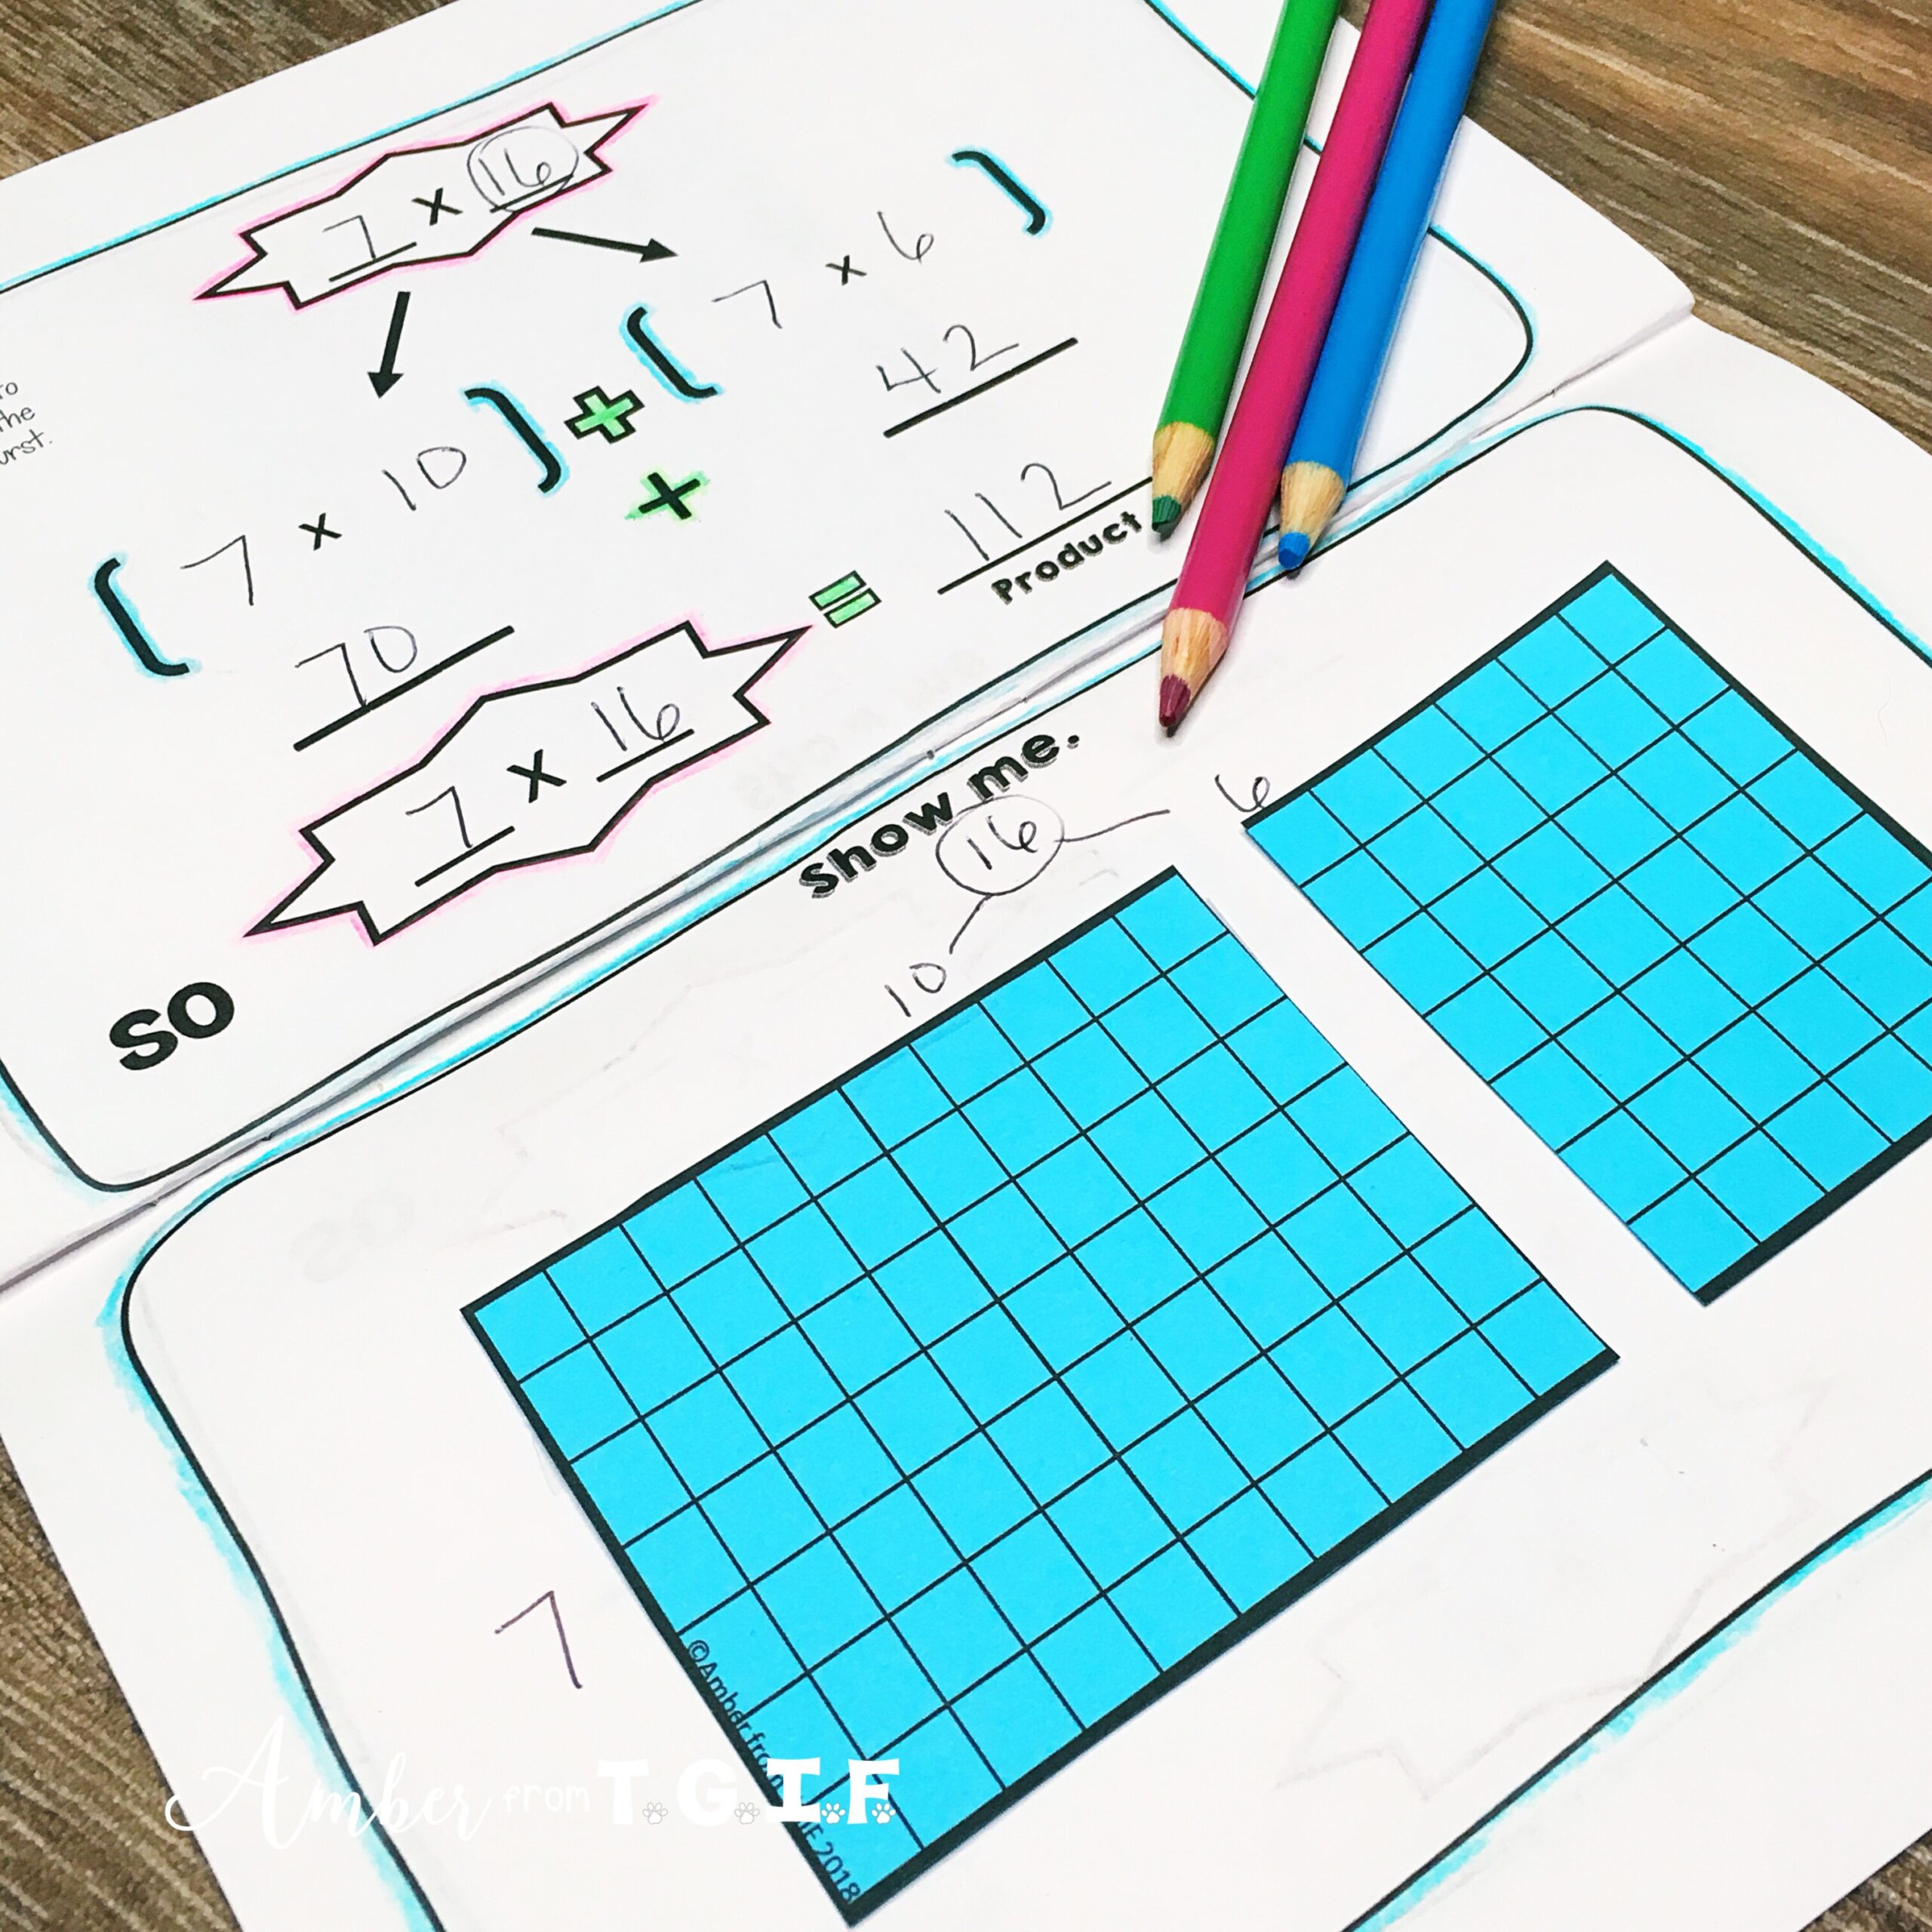
I also print out some grid paper and have my students cut out arrays. On the top of the book we show the steps and on the bottom of the paper, we physically cut apart the array. The mini books are helpful because they are only looking at one “problem” at a time and they don’t tend to get overwhelmed. Making the cuts take some planning so I encourage them to write out their two factors and circle the one they are breaking apart before cutting the array.
These mini books and grid paper are available for a quick starts.
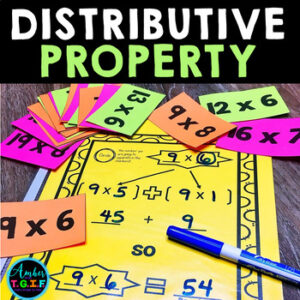
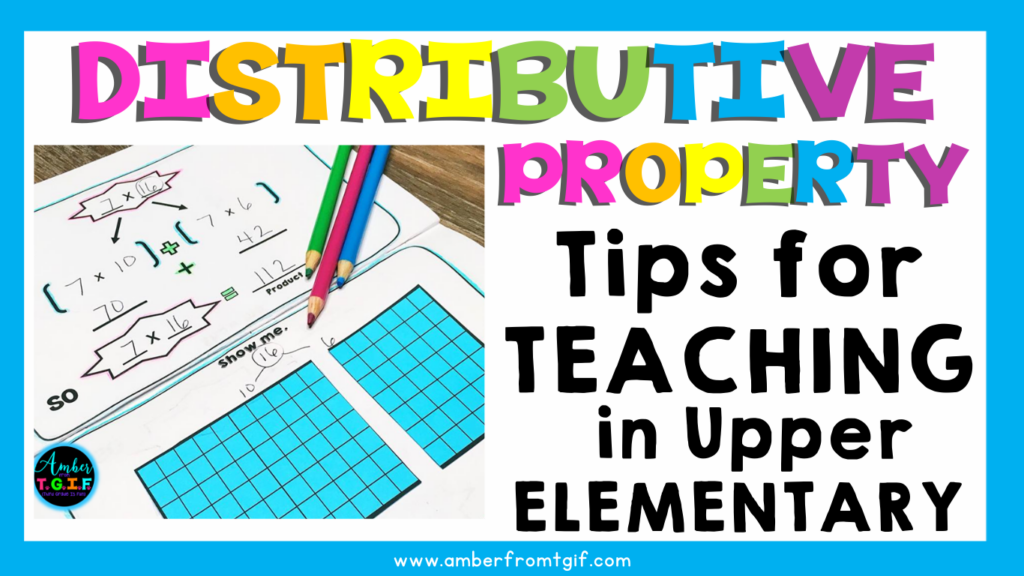
Color the Multiplication Arrays
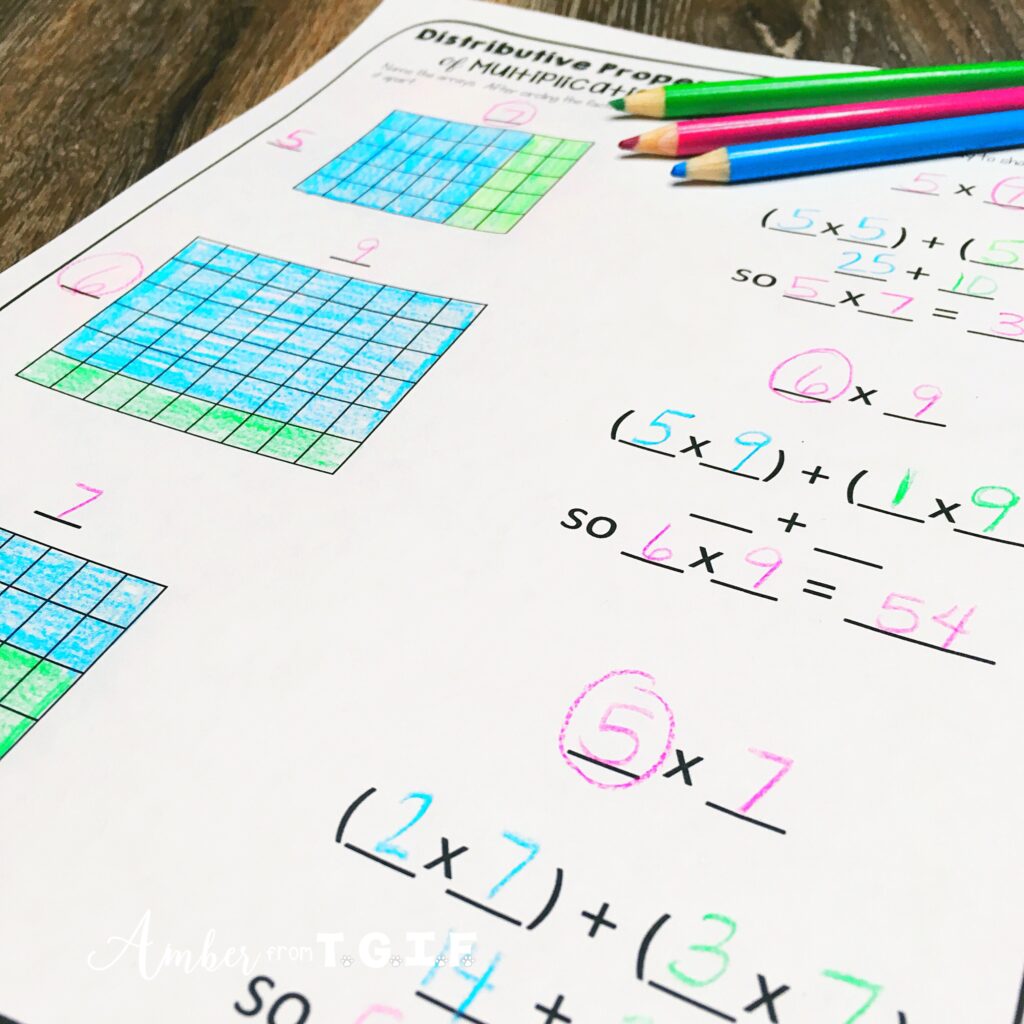
Another method we use to practice is to color code everything! As you can see in the picture, we write the factors in the large array in pink and decide which one to break apart by circling it. Then we use two different colors to show how we broke it apart both in the array and in the number sentence.
It is my sincere hope that after reading this post, you have gained some new inspiration and confidence for teaching the distributive property of multiplication. You have the tools (beans and your ingenuity) to make it work, but if you want some printable resources (because let’s face it – teaching is tiring), you can find loads of help in this Distributive Property of Multiplication resource pack.